




Techniques for Installing Cable Ties in Tight Areas
A panel builder wanted to bundle control wiring behind a crowded DIN rail. He discovered there was hardly sufficient space for his fingers to get in the area, let alone fit a basic cable tie or a tensioning tool in the area. The space between the wire duct and the enclosure wall was not even two inches. The installer spent ten longer and frustrating minutes trying to pull the tail of the cable tie through its head despite it twisting, slipping, and breaking before properly applying tension on it. What should have taken seconds to complete became the bottleneck in the procedure, leaving the work looking messy with slack cable ties. The issue was not with the cable ties used but rather with the method employed in fixing it.
Summary: A successful installation of a cable tie in a confined space relies on three key elements: choosing the appropriate type of tie for the job (for example, a thin-headed, a miniature tie, or a flexible-tie), using the appropriate technique (including pre-threading, bending the tail, and using an extension tool), and employing auxiliary devices to facilitate accessibility (for example, mounting bases, magnetic holders, or pre-looped ties). The most common errors — using an unsuitable type of tie in an inaccessible area, tightening at too extreme an angle, and using an oversized tool to cut the tie length — can all be avoided by applying the right technique for the specific installation location.
Why Tight Spaces Make Cable Tie Installation Difficult
A cable tie is an uncomplicated device comprising a thin strap with a locking head. Generally, putting one in place requires using two hands, one to hold the cable package and the other to insert a end into locking head and tension it. In a constrained space, one might not have room for two hands. There may not be room for even one hand. The locking head may be so closely pressed against a wall that the end is prevented from entering it at a Straight angle. The end may be bent at a difficult angle causing the strap to jam or kink. The device for tightening — the gun-like tool with a head that must fit firmly on the locking head — may be too large to fit into the gap between the bundle and the obstruction. The last step of cutting the end flush requires a cutter with a short neck and a precise head fitting into the locking head without touching adjacent wires. Each of these limitations can turn the task of installation, expected to take no more than 5 seconds, into 5 minutes of stress. The solutions are classified into three types: choosing a cable tie with smaller dimensions and ease of manipulation, applying techniques that minimize the need to access the area needing assembling, and using special tools designed for working in tight spaces.
Selecting the Right Cable Tie for Confined Spaces
Selecting the right type of cable tie may be the crucial decision in tight environments well before the installation begins. Indeed, not every tie will fit the bill in conditions with restricted access. The table below shows how the cable tie characteristics are compared among different types of existing ties.
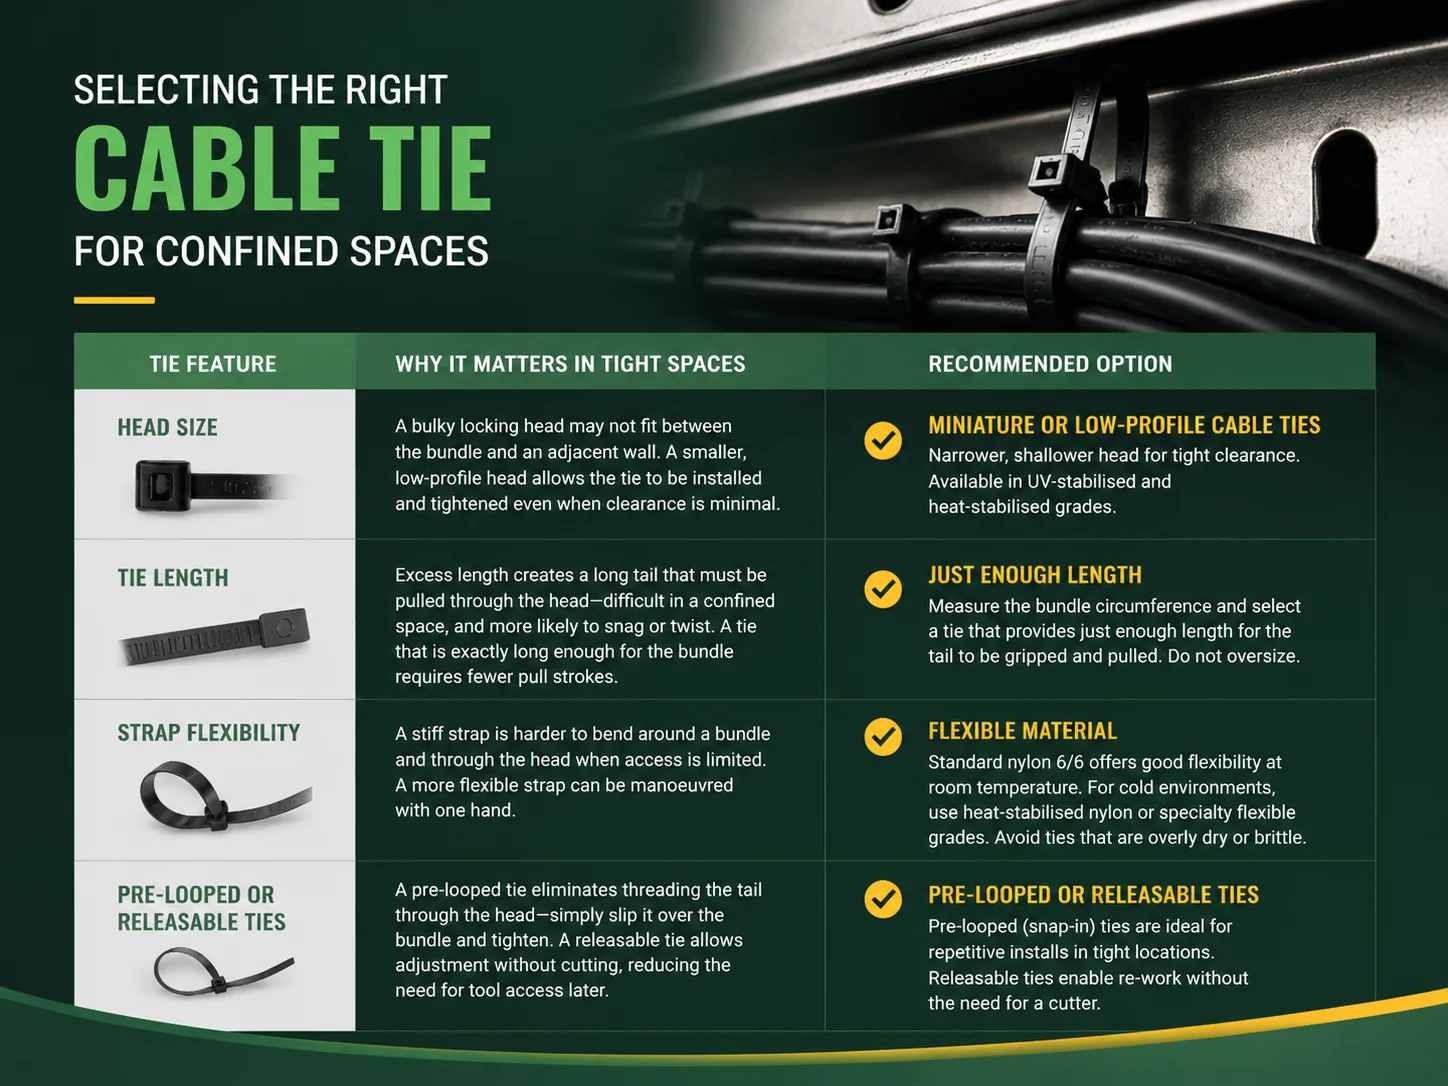
| Tie Feature | Why It Matters in Tight Spaces | Recommended Option |
|---|---|---|
| Head size | A bulky locking head may not fit between the bundle and an adjacent wall. A smaller, low‑profile head allows the tie to be installed and tightened even when clearance is minimal. | Miniature or low‑profile cable ties, which have a narrower and shallower head than standard ties of the same width. Many manufacturers, including igoto, offer these in UV‑stabilised and heat‑stabilised grades. |
| Tie length | Excess length creates a long tail that must be pulled through the head — difficult in a confined space, and more likely to snag or twist. A tie that is exactly long enough for the bundle requires fewer pull strokes. | Measure the bundle circumference and select a tie that provides just enough length for the tail to be gripped and pulled. Do not oversize. |
| Strap flexibility | A stiff strap is harder to bend around a bundle and through the head when access is limited. A more flexible strap can be manoeuvred with one hand. | Standard nylon 6/6 has good flexibility at room temperature. For cold environments, heat‑stabilised nylon or a specialty flexible grade may be needed. Avoid ties that have become overly dry or brittle. |
| Pre‑looped or releasable ties | A pre‑looped tie does not require the tail to be threaded through the head during installation — the loop is already formed, and the tie is simply slipped over the bundle and tightened. A releasable tie can be adjusted without cutting, reducing the need for tool access later. | Pre‑looped cable ties, also called “snap‑in” or “bundle‑ready” ties, are ideal for repetitive installation in tight locations. Releasable ties allow for re‑work without requiring a cutter. |
Pre‑Threading and Pre‑Looping: Reducing the In‑Place Handling
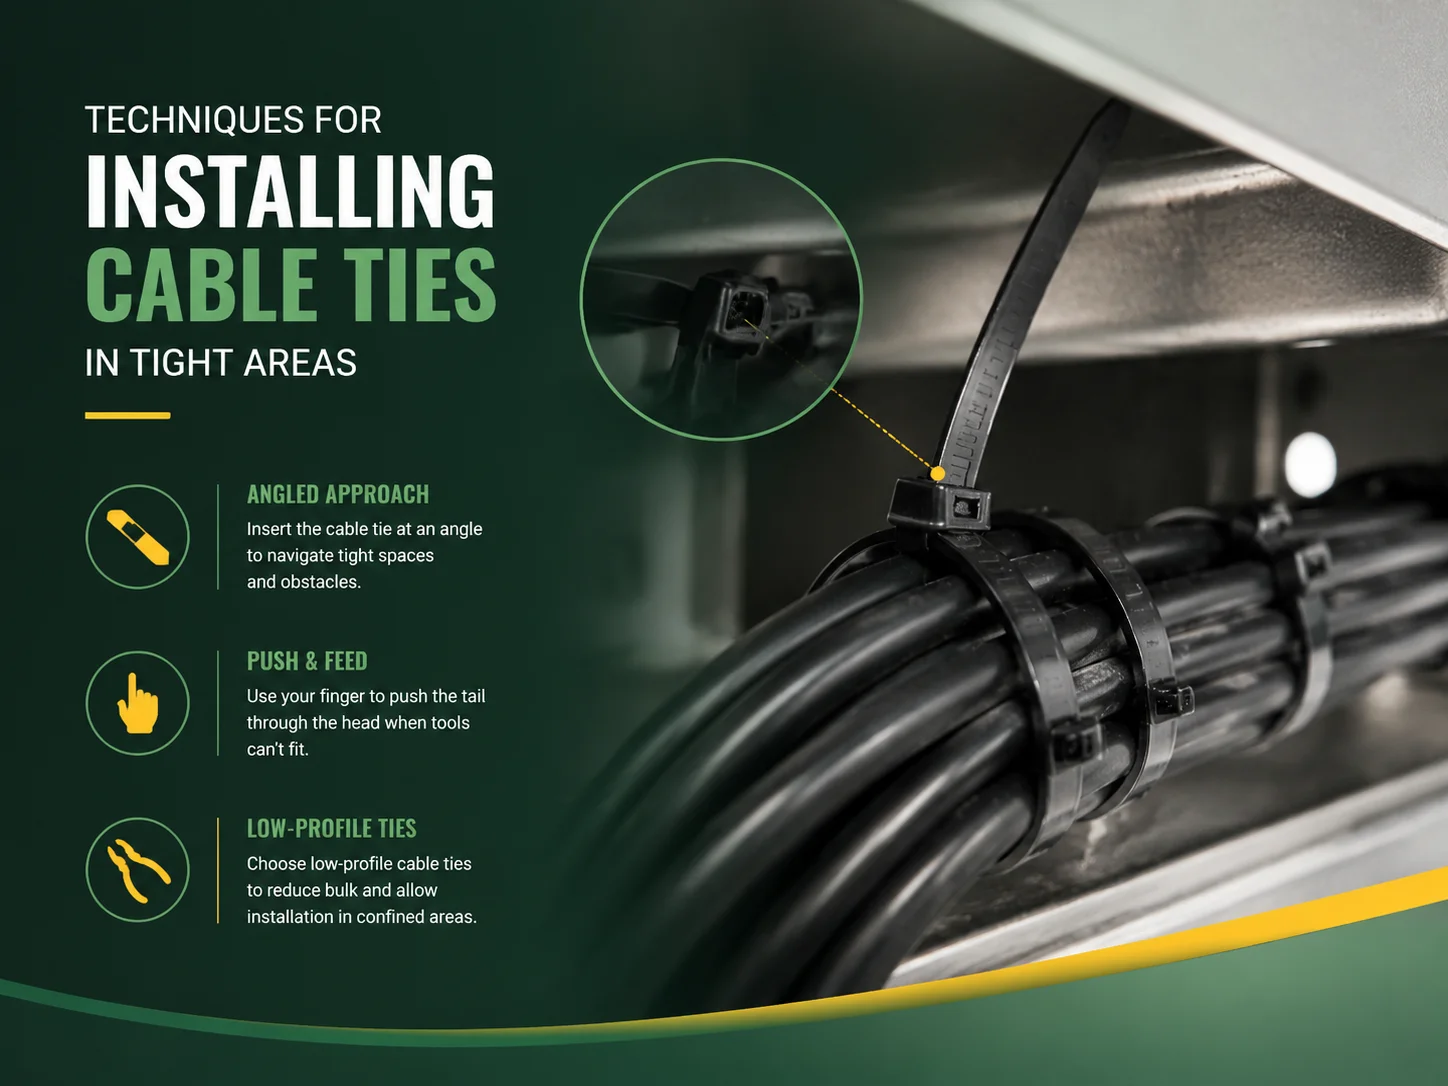
To install cables in tight spaces, let’s move as much of the installation as possible out of the tight space. Prethreading a tail makes it possible to just loop it around the bundle instead of threading. Prelooping goes one step farther since the tie comes prelooped and is placed right on the end of the bundle. This is effective in situations where the tie can be installed later on, like adding a tie into a crowded cable tray.
With standard ties, the tail can be threaded by hand in advance of the installation. The tail must not be threaded sufficiently for the pawl to engage, allowing the loop to be opened enough for installation on the bundle. только после этого устанавливающий может раздвинуться петлю, навести её на место, и с помощью одной руки потянуть за хвост, пока другой рукой удерживает её на месте.
Essential Tools for Tight‑Space Cable Tie Installation
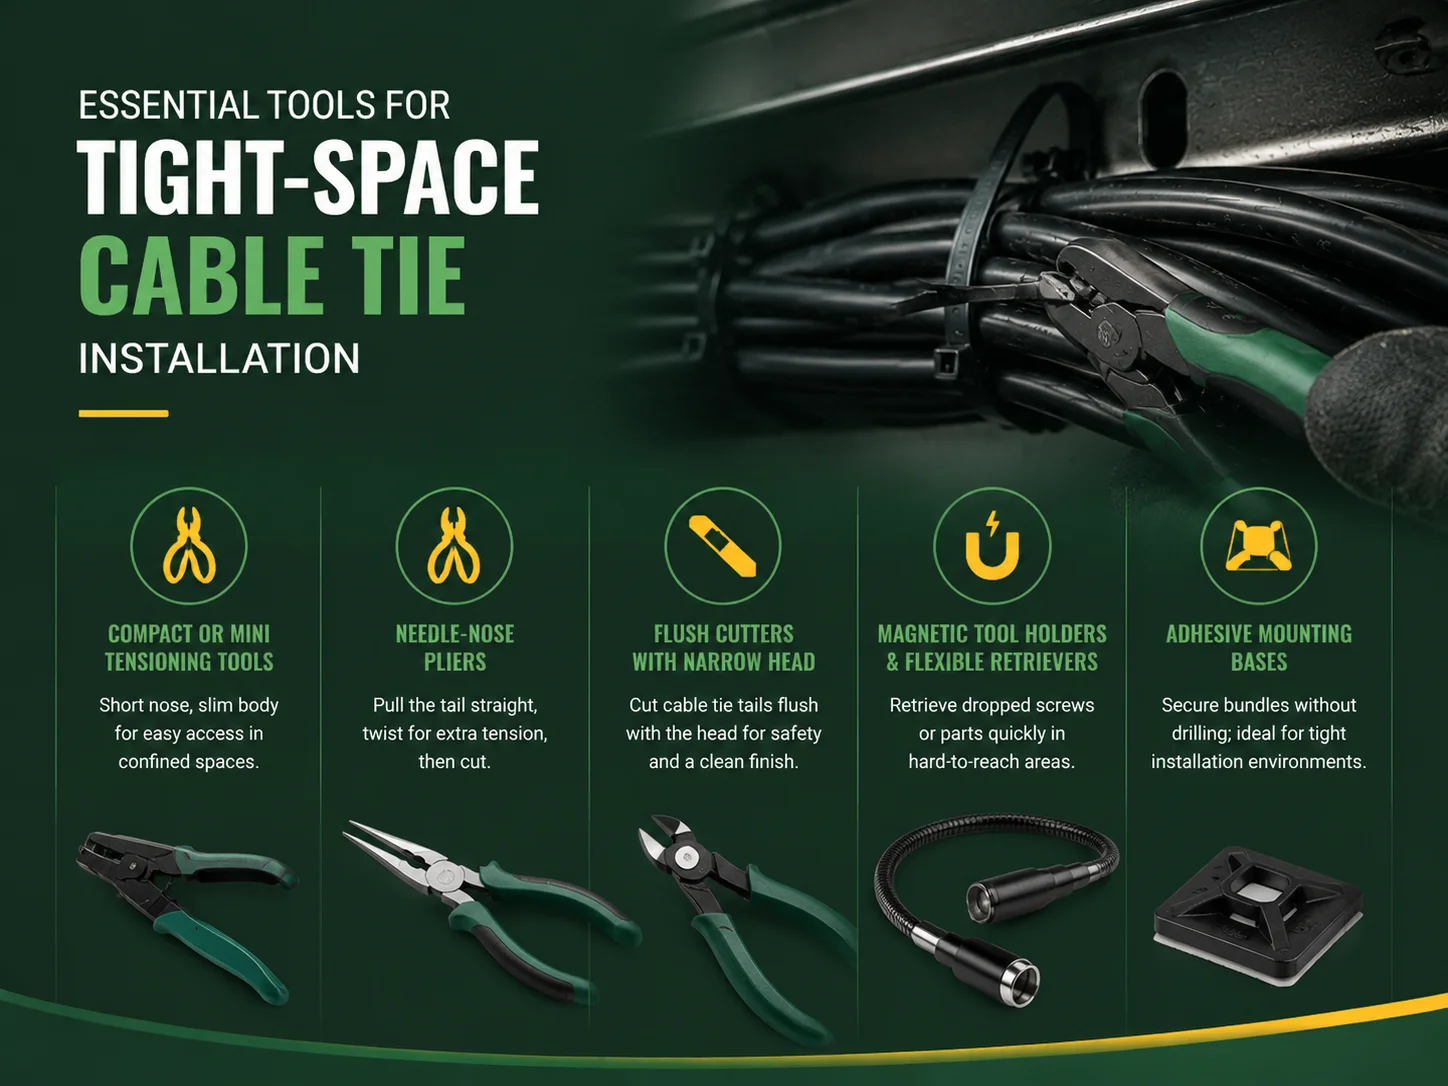
A proper tool can change a tedious setup experience into a quick and stable one. For narrow places, the conventional full-sized cable tie flyer might prove to be too big to fit. Below are the items and tools that are tailor-made for a limited reach:
- Compact or mini tensioning tools. Many companies, such as Panduit and HellermannTyton, manufacture tensioning and cutting tools that are small enough to be used in areas that full-size tools cannot reach. The small size of the tools means that they have shorter noses and thinner bodies, and they are manually used rather than pneumatic. These small tools are very important for panel builders and electricians who often work in enclosures.
- Needle‑nose pliers with smooth jaws. In a situation where it is not feasible to use a tensioning device, a couple of needle-nose pliers with smooth jaws may be used to pull the tail, but care should be taken to pull it straight without angling, to prevent damaging the toothed parts or the insulation. Pull on the tail until the tie becomes tight around the bundle before twisting the tail using the pliers (half a turn) to obtain more tension before cutting it.
- Flush cutters with a narrow head. When it comes to cutting the tail of the device, it is important to make the cut flush with the head. This is essential in order to keep both the technician and nearby cables safe from injury. A small pair of flush cutters can be used, which are specially made for the working environment where space is limited. In these operations, the cutter blade has to be positioned such that its dead side is facing towards the head of the device.
- Magnetic tool holders and flexible claw retrievers. When a bolt or a screw falls in a restricted space, it can take a good amount of time to get it back without dismantling the machine. A magnetic pick-up tool or flexible claw reaching tool is a simple but useful device that pays back with time saved on every job.
- Cable tie mounting bases with pre‑applied adhesive. In a tight location, attaching a bundle to a surface can be more efficient by using an adhesive‑backed mounting base, which means no drilling or screwing is required. The tie is passed through the base before the bundle is placed, and then the base is applied firmly on the surface. This method is particularly valuable in cases of cabling inside a cabinet or beneath a desk, where drill access is limited. In heavy bundling, a screw‑mount base is more reliable than adhesive but demands sufficient space for driving the screw.
Bending and Routing the Tail Through the Head with Limited Access
The typical difficulty in a confined space is that the tail approaches the head at an uncomfortable angle, or the head is pressed against a wall with no straight line available for the tail. In such cases, several methods can be applied to transport the tail through the head without forming a kink in the strap.
- Bend the tail into a gentle curve before insertion. A tail that is naturally bent into a gentle curve will make it easier to enter the head at an angle than a tail that takes a hard bend. The tail should be bent in the manner that allows the curve to direct it through the opening in the head. This technique works well when the installer is facing away from the head with the tail coming in from the side.
- Use a thin, stiff guide wire or a pick to direct the tail. In the case of extreme examples, like having only a small opening in the backplate, we can take the help of either a thin stick, a rigid wire, or a dental hook to help guide the tail through the head. One must press the tail into position with the help of a finger while inserting the stick from the other end and pulling the tail through with it.
- Start the tie from the opposite direction. When the head is located on the side of the bundle that cannot be accessed while the tail is located on the side that can be reached, it suffices to reverse the knot. In this case, the tail is wrapped around the bundle from the accessible side and is brought to the head. The tail can then be pulled from behind. This solution tends to be easier than attempting to reach the head the hard way.
- Use a longer tie to create a remote tightening point. In case of a narrow working space, it is possible to utilize a long tie that will make placing the locking head outside the restricted zone possible thereby allowing the tensioning tool to access it. The excess portion of the tail is then pulled through the locking head resulting in cutting it flat with the workpiece. While wasting a little bit of material, significant time can be saved.
Using Mounting Bases and Anchors to Secure Bundles Where Ties Cannot Reach
In some instances, the limited available area even prevents bundling a bundle using a tie — as with, for example, when a wire passes along a wall without behind clearance whatsoever. Therefore, the wire should not be bundled, it should just be secured. Adhesive-backed clips are the quickest solution for light-use indoor routing — all, that needs to be done is to insert the cable into the clip, which is affixed to a flat surface. In case of thicker cables, a screw-mount pneumatic cable clamp (P-clip) provides a good grip, but there has to be some space to use a screw. One of the alternatives is a mounting device using a magnet for steel casing and panels: the magnetic device is attached by a strong magnet, and a regular tie is mounted on it.
Specialty Cable Ties Designed for Tight Access
Besides the conventional nylon cable tie, a number of specialized products have been developed for tough jobs. The hook-and-loop strap is reusable, flexible and handheld, so it can be put around the bundle without the need to have a removable band. While it is not as strong as the nylon tie and hence cannot be used for heavy jobs, it is the quickest option for simple indoor tasks in the cramped quarters. One can use spiral wrap which can be placed around the bundle easily and does not require any tools. Similarly, the flexible cable chain allows for both the bundling and the mechanical protection of cables inside. For a broader look at these alternatives, our guide on alternatives to cable ties covers each option in detail.
Common Mistakes to Avoid in Tight‑Space Installations
Most mistakes in laying cable ties in hard-to-reach places are easily preventable with some advance planning. If the tie is too large, it will have an elongated, difficult to pull and cut tail in a confined area. When excessive tension is applied at an angle, it causes the tie to dig into the insulation of the cable, primarily in the case with data cables. When a regular tensioning instrument is used in a cramped location, it may become jammed, or the tie may not become tight enough. Leaving pointed tail hanging outside due to inability to cut it flush leads to a danger for any person who tries to touch the area later. The solution in all of these cases is simply to choose the appropriate tie, tool and method.
Frequently Asked Questions
What is the zip tie trick?
The “zip tie trick” generally means a method allowing to release normal cable tie without needing any cutting by putting a thin instrument, such as a pin, jeweller’s screwdriver or special release tool, into the locking head causing the pawl to be lifted while pulling the strap towards behind. It is possible to apply this trick in a confined area to loosen the tie that has been tightened too much or to redirect the bundle without cutting the tie. Nevertheless, with a fully tightened tie, this method is hard to use and often causes damage to the locking mechanism.
How to properly install cable ties?
When installing a cable tie, make sure that the length and tensile strength of the tie is proper for the job at hand. Insert the tail of the tie fully through the head of the cable tie, wrap it around the bundle, and with the inserted tail, pull until the cable is tight to the cables but not too tight to cause any damage to the insulation. Use a tensioning device to achieve correct tensions on the tie or pull it by hand. Cut the tail of the tie as flush as possible using some flush cutters.
What kind of tool is utilized for the installation of a cable tie paired with a predetermined amount of tension and for snipping off the surplus end?
A tensioning machine for cable ties (known also as a cable tie gun) provides an accurate amount of tension to the cable ties and cuts off their tails in one action. There are manual, pneumatic, and battery-powered types of these devices available from such companies as Panduit, HellermannTyton, and ABB (Thomas & Betts). The compact or mini machines are made for smaller areas where it is impossible to use an ordinary machine.
How to join cable ties to make them longer without?
To connect two pieces of cable ties to make longer, simply insert the tail part of one into the head of the other, and then insert the tail of the second into the head of the first. After that, pull both tails tight to create a longer loop than a single piece of cable tie; however, the connection point is the weakest spot — the total tensile strength is the same as the strength of each individual cable tie, and the connection point might slip. This is a useful solution in the field, but it shouldn’t be used in applications that are safety-critical or that will carry a lot of weight. A single cable tie of the proper length is always better.
References
- Panduit — Cable Tie Installation Tools and Accessories. Manufacturer of tensioning tools, compact cutters, and specialty ties for confined‑space installation.
- HellermannTyton — Cable Tie Tools and Application Guidance. Supplier of manual and pneumatic tensioning tools, mounting bases, and pre‑looped cable ties.
- Klein Tools — Precision Cutters and Electrical Hand Tools. Manufacturer of flush cutters and needle‑nose pliers commonly used for cable tie installation in electrical enclosures.
- UL 62275 — Cable Management Systems. The standard that defines the testing and performance requirements for cable ties, including the correct installation tension and the specifications for compatible tools.
Installing a cable tie in a tight area is a test of preparation, not of patience. The tie that is pre‑threaded, the tool that fits the space, and the technique that routes the tail around the obstacle are the difference between a secure, professional bundle and a loose, frustrating knot. The installer who knows how to select a low‑profile tie, how to bend the tail for an angled entry, and how to use a compact tensioning tool in a space that barely fits a hand is the installer who finishes the job on time, with no sharp tails, no damaged cables, and no wasted ties. igoto supplies the full range of cable ties — standard, miniature, pre‑looped, and UV‑stabilised — and the accessories that make tight‑space installation a controlled, repeatable process rather than a struggle.