




What Are Mountable Cable Ties?
You’re organizing wires and cords around your computer desk and walls, using LED strip lights, tucking them away inside electrical cabinets, or forming them into coils. But ordinary zip ties cannot manage that because they won’t hold securely. The mountable cable tie gets rid of that problem. It offers the combination of a regular zip tie and a mount, so you place the mount on the wall, board, or device — it can be glued or screwed to it — and the tie is already in place. This article describes mountable cable ties, their appearance, their differences from ordinary cable ties, their prices, how to install and uninstall them, and which model you need.
Quick answer: Mountable cable ties (also known as mounting cable ties, cable tie mounts, or adhesive cable tie bases) are basically cable ties with a mounting base that you can fix to any surface to allow the tie to hold position while holding on to your cables. Mountable cable ties come in five principal mounting types, polt mount or screw mount, push-in, snap-in, rivet and adhesive-backed types.
What Are Mountable Cable Ties?
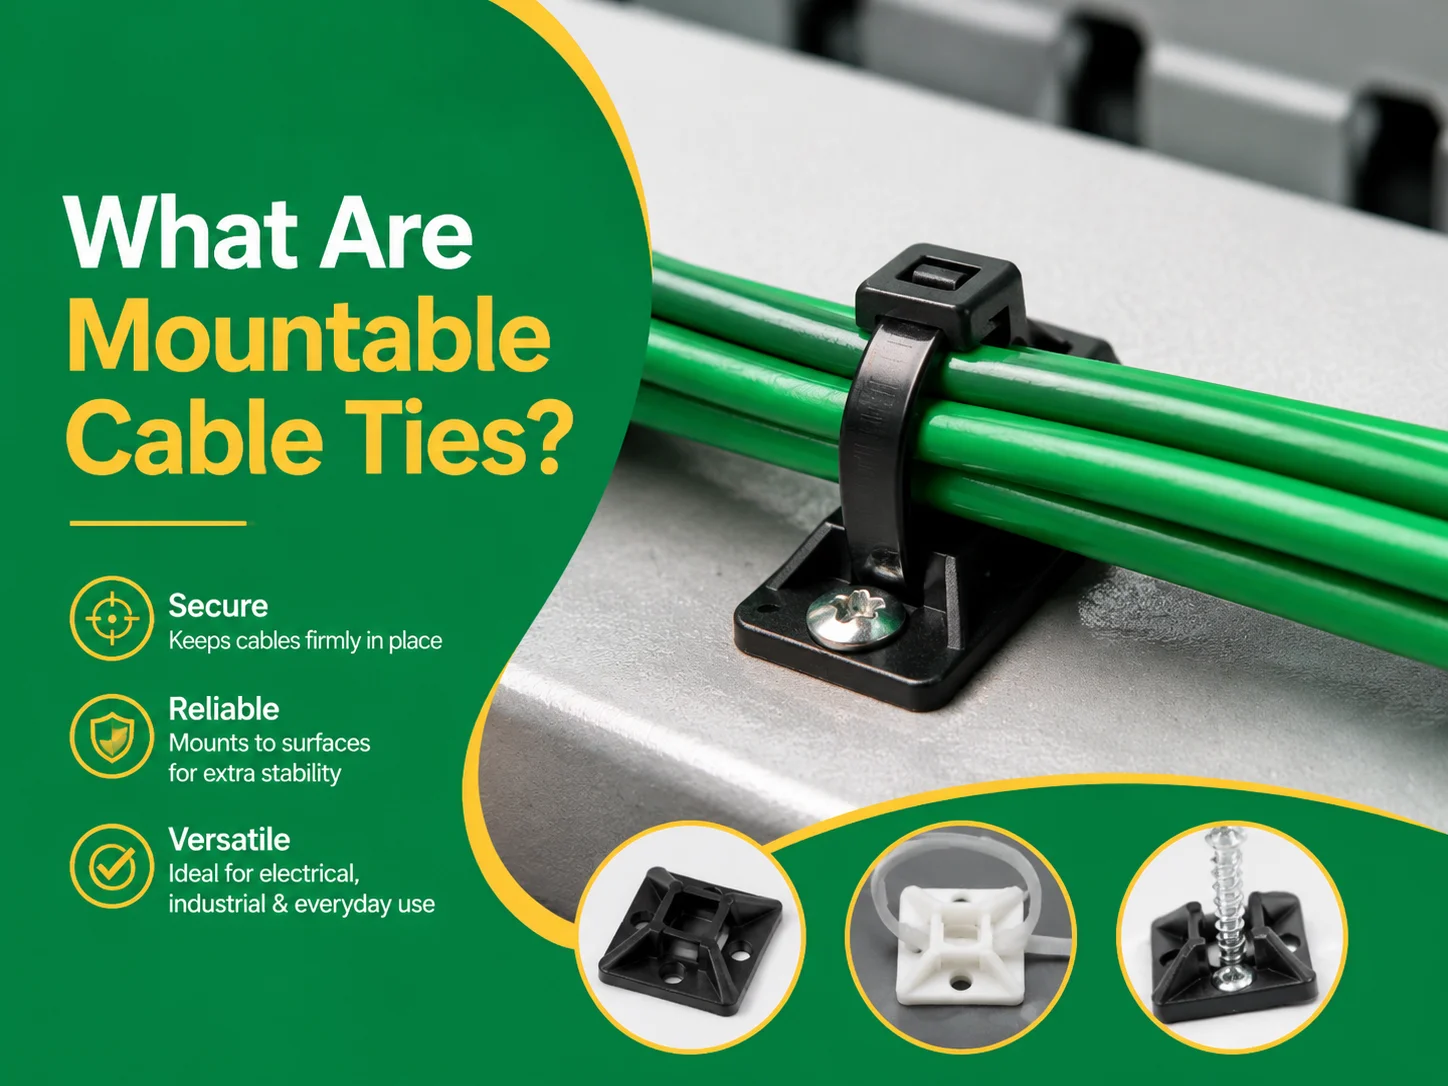
Mountable cable tie is a type of cable tie possessing a mountable base or point, which enables it to be attached to any surface. It solves two problems at once by acting as a hook for bundling wires (like any usual cable tie) and fixing that bundle on a wall, machinery, some equipment, or a vehicle.Mountable cable ties exist in two main designs:
- One-piece ties: The tie’s head contains a molded attachment (it could be a screw opening, a push-in arrow, or an adhesive base) that combines with the tie to form one component.
- Two-piece mounts and ties: Separate mounts (adhesive mounts or mounts with screws) are to be attached to the surface and the cable ties stuck into the slots of these mounts.
There are also kits sold by manufacturers; for example, kits of 100 adhesive mounts and 100 cabtie sticks are manufactured.
If you’re still getting familiar with cable tie basics — sizes, materials, and naming — our guide on standard cable tie sizes is a good place to start before diving into mounting options.
What Do They Look Like?
Mountable ties are different from normal holds in three visual aspects:
- The head: Mountable ties have a locking traditional ratchet head, and a single-piece head that has a flat wing or base, where either glue is used for its bottom part, or a screw hole (usually, this hole doesn’t exceed the size of M3, M6 screws or is represented by #6, #10 in imperial units).
- The strap: Is the same as in other types of nylon ties (this means that it is a soft strip with teeth, which locks in the head). The lengths of the strap can vary from the shortest 100mm to the longest 370mm and more, while the width can differ a lot too from 2.5 mm to the heavy version of 9 mm.
- Colors: Natural (transparent), black (having some protection from UV rays), white, yellow, red, green, blue, and many others.
Things with an adhesive bottom look like little pads, which are made in the following sizes: 19x19mm, 25x25mm, 28x28mm. The only difference is that sometimes there can be one or two cuts that are made on the top side for putting a tie on the pad.
Mountable vs. Regular Cable Ties: Key Differences
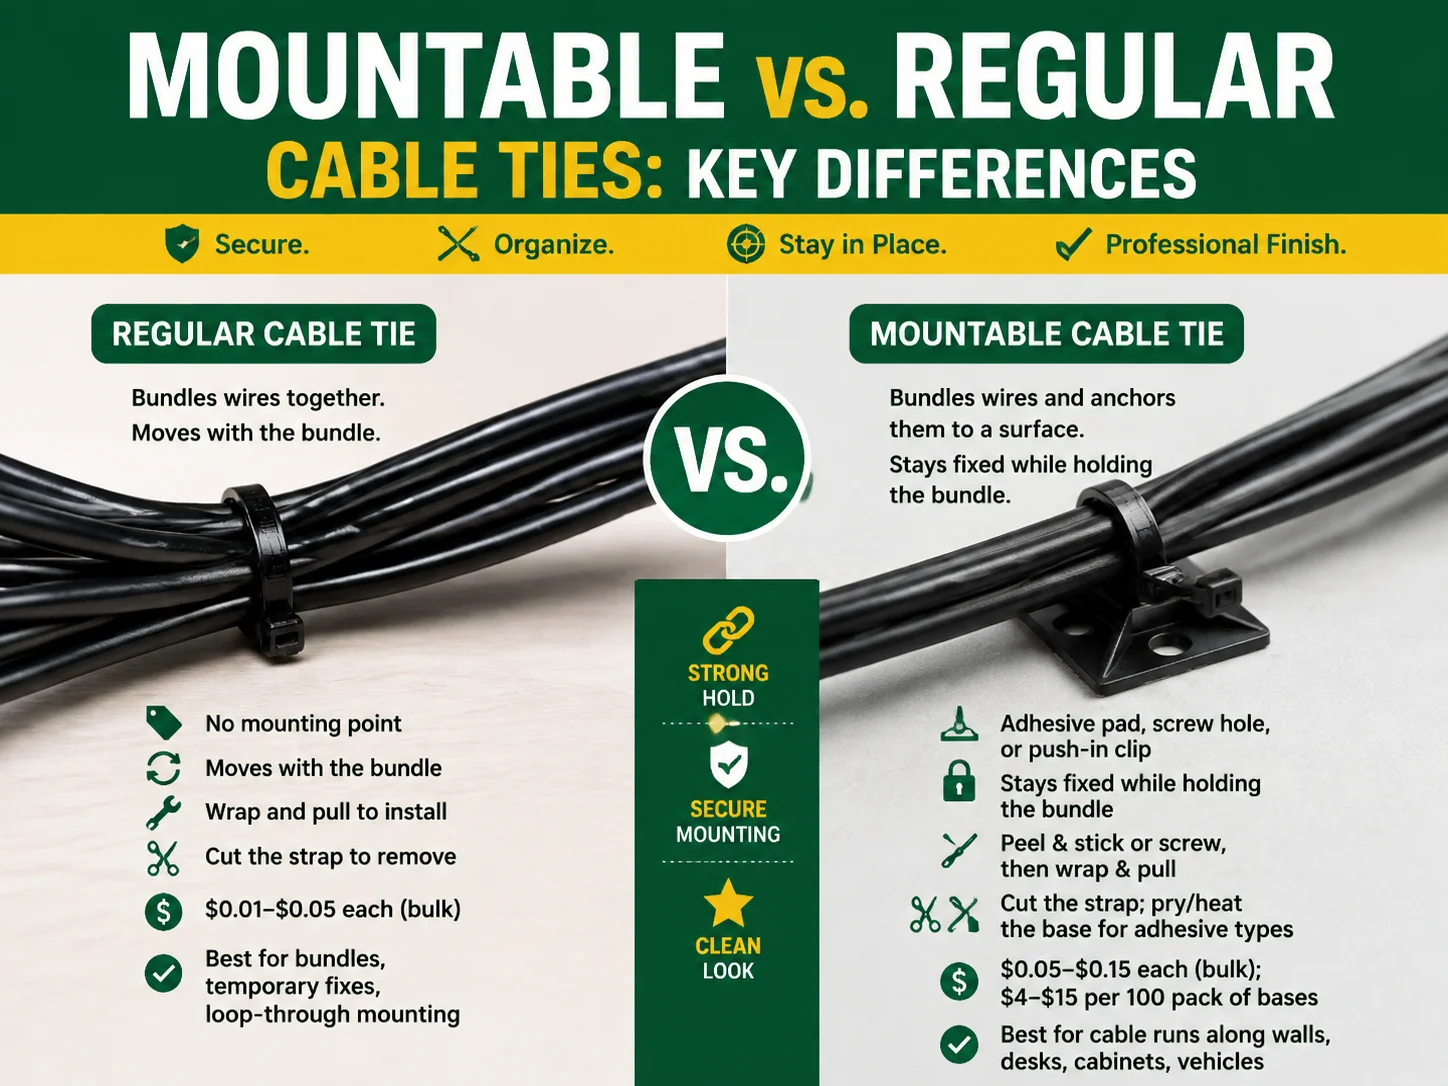
| Feature | Regular Cable Tie | Mountable Cable Tie |
|---|---|---|
| Main job | Bundle wires together | Bundle wires and anchor them to a surface |
| Mounting point | None | Adhesive pad, screw hole, or push-in clip |
| Where it works | Anywhere you wrap it | Needs a flat surface (or hole) to attach |
| Stays in position | Moves with the bundle | Stays fixed while holding the bundle |
| Installation | Wrap and pull | Peel/stick or screw, then wrap and pull |
| Removal | Cut the strap | Cut the strap; pry/heat the base for adhesive types |
| Best for | Bundles, temporary fixes, loop-through mounting | Cable runs along walls/desks, cabinets, vehicles |
| Typical cost | $0.01–$0.05 each (bulk) | $0.05–$0.15 each (bulk); $4–$15 per 100 pack of bases |
The brief description: a plain tie keeps your cables together; a mounting tie holds your cables together and secures it in one place. If you want your cables to look good and stay properly positioned, then you need mounting ties.
5 Mounting Types & When to Use Each
| Mounting Type | How It Attaches | Strength | Best For |
|---|---|---|---|
| Adhesive-backed | Peel-and-stick 3M foam pad; optional center screw | Good on smooth, clean surfaces; best for light–medium loads | Desks, walls, panels, cabinets, home theater — no drilling needed |
| Screw-mount | M3–M6 or #6–#10 screw through the base | Very high; permanent, vibration-resistant | Industrial cabinets, machinery, vehicles, outdoor runs |
| Push-in (arrow head) | Molded arrow that snaps into a pre-drilled hole (typically 4.8–6.8 mm) | Medium; quick install, removable | Electrical enclosures, appliances, panels with knockouts |
| Snap-in / clip-on | Clips onto a panel edge or DIN rail | Medium–high | Control cabinets, wire trays, edge mounting |
| Rivet | Blind rivet through the base | Very high; permanent | Heavy bundles, metal panels, harsh environments |
An important guideline is using adhesives for surfaces where you can’t drill holes, screws for situations that include weight or vibration, push-in ones for panel knockouts, and snap-ins for tray edges and DIN rails.
What Are They Used For?
Mesh Technology’s cable ties are used everywhere where cables are required to be organized:
- At home and in the office: Hiding cables under the desk, routing cables along baseboards, cleaning up computer and TVs setups, mounting LEDs
- In the automobile: Tightening wiring harnesses to a car’s body, fuel lines, and interior trim (screw and push types)
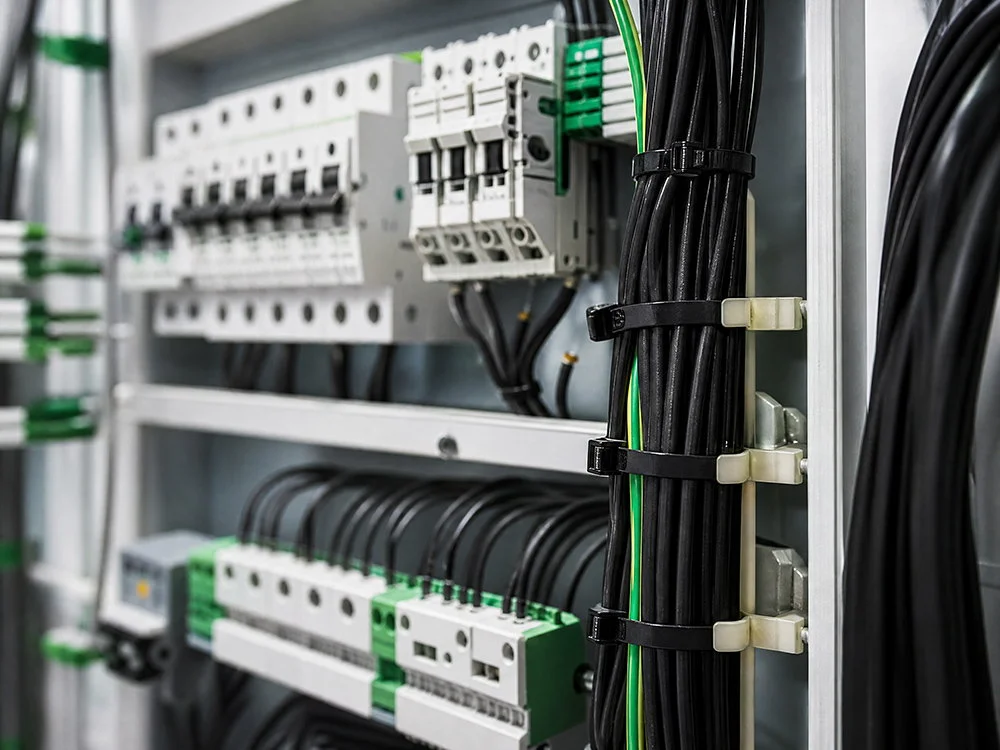
- In electrical cabinets: Holding all wire bundles in place on the panel so they don’t sag and touch other components
- In telecom and networking: Managing patch cables inside a server rack and a data center
- In manufacturing: Routing wires on machines, conveyors, and robotic arms
- In agriculture and outdoors: Securing irrigation lines, wires inside greenhouses, and signage (UV protected black nylon)
- In marine and RV: Mounting wires where vibrations occur, usually using screw mounts.
For more every day uses of cable ties and comparisons to other types of ties, make sure to read our related articles on the functions and applications of nylon cable ties, and heavy duty zip ties.
How to Install Mountable Cable Ties
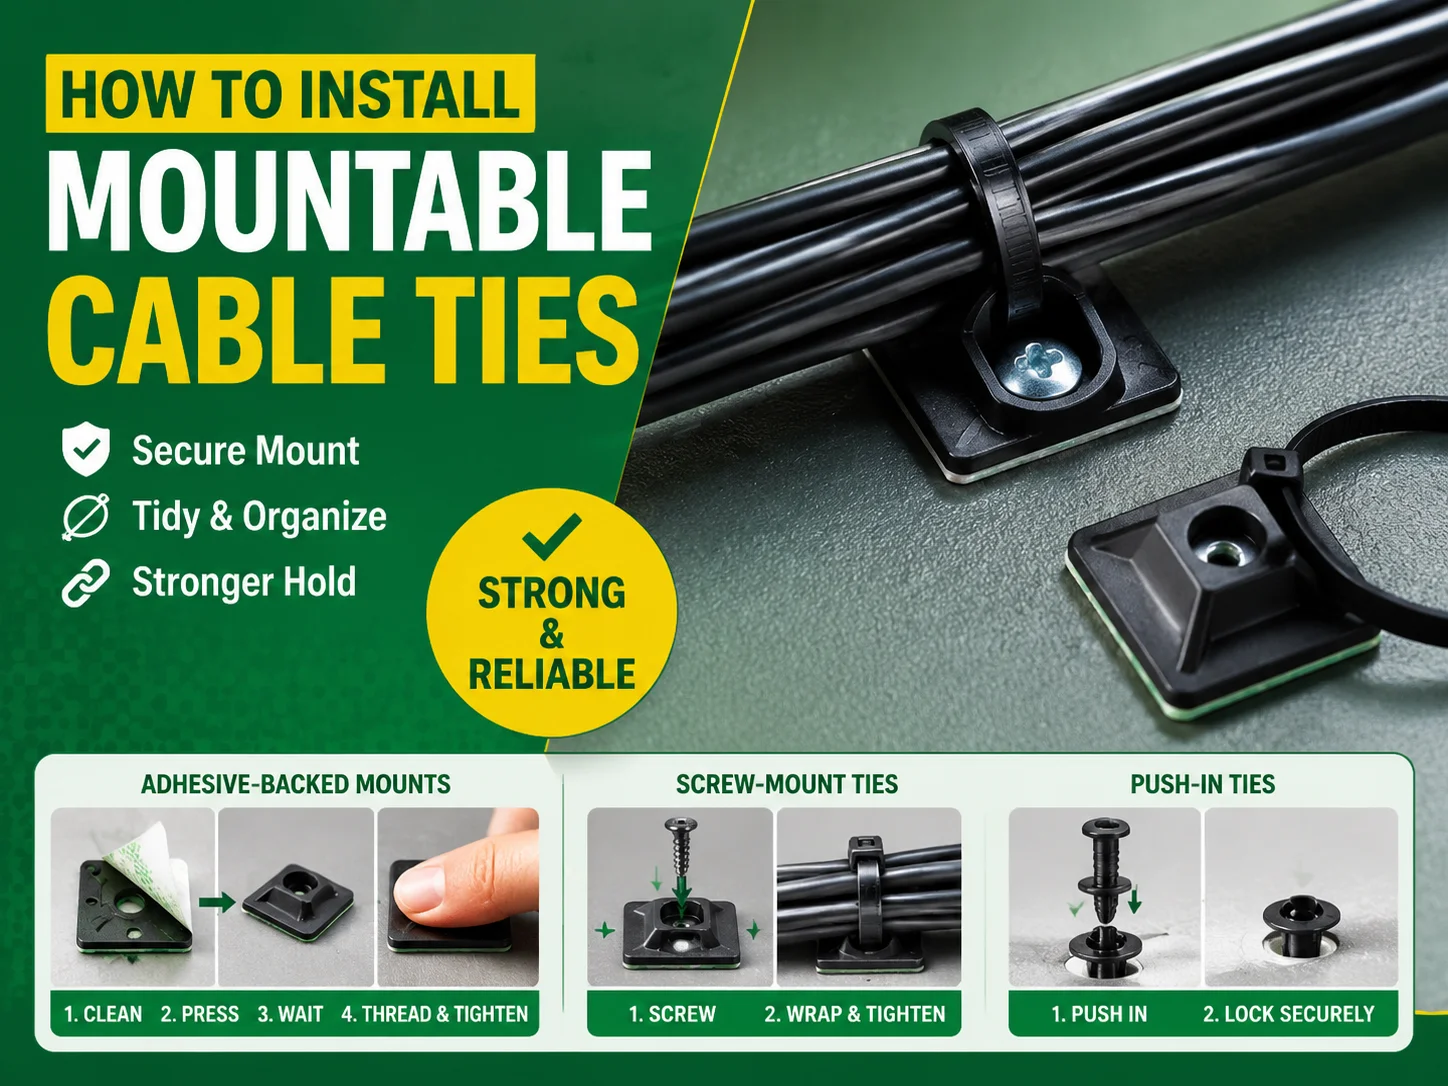
Adhesive-Backed Mounts (the most common DIY type)
- Prepare the surface by cleaning it: Use a degreaser or isopropyl alcohol to clean the place of installation and allow it to dry thoroughly. The cleanliness of the surface is a prerequisite for good adhesive properties, dirt and grease substantially reduce adherence.
- Set the mount in place: Remove the liner from the adhesive and do not touch the adhesive part of the mount with your fingers while removing the liner.
- Apply pressure on the mount: Fix the mount onto the surface and keep pushing for about ten seconds evenly in every part of the mount.
- Allow the mount to be in place for some time: Wait from 15 to 30 minutes (or follow the installation guide provided by the manufacturer) and only after that proceed to use it.
- Use the screw if necessary: For the case of heavy wires it is wise to use a screw that will provide extra strength to the fastening point.
- Put the cable ties in place: Insert the strap of the cable tie into the opening and wrap it around several wires applying good pulling force.
Screw-Mount Ties
- Mark and puncture pilot holes at your installation locations.
- Insert the screw (M3–M6 / #6–#10) into the tie base. When utilizing panel holes, use the right bit size.
- No matter the type of tie you are using, wrap it around the bundle and secure it tightly.
Push-In Ties
- Drill or make use of a pre-existing hole of the right size (generally 4.8–6.8 millimeters).
- Press the arrow head firmly until it goes through the panel effortlessly.
- In case of removable push-in ties, press the release levers from the back side in order to remove it at a later stage.
Pro tip for tight spaces: If you’re working in a cramped cabinet or behind furniture, our guide on techniques for installing cable ties in tight areas has tricks for positioning and tensioning ties with one hand.
How to Remove & Reuse Them
- Removing the tie strap: Slice the strap off with a pair of flush cutters (or diagonal cutters). A typical one-piece adhesive mount may feature a release tab on the mount’s head: push it down to disable the ratchet, enabling you to pull out the strap and reuse the mount.
- Removing the adhesive base: Breathe heat on the foam adhesive with the help of a blow drier or hot air gun for 10-20 seconds to warm it and then use a putty knife to disengage the base. Clean the surface with isopropyl alcohol or citrus cleaner to get rid of the residue adhesive. Note that adhesive pads are not reusable and if you take the mount out and decide to use it again, use a new pad as a replacement (or the center screw for remount purposes).
- Removing the push-in tie: Squeeze the release wings behind the panel and pull the arrow out of the mount. It is worth mentioning that the majority of push-in tie designs provide possibility of reuse.
- Removing screw/rivet making types: Simply unscrew the screw from the mounting, or drill the head in case of riveted mounts.
For more detail on releasing and reusing standard ties, see our guide on how to remove cable ties without damaging wires.
Price Guide
Prices vary by mounting type, size, material, and pack quantity. Here are realistic market ranges:
| Product | Price Range |
|---|---|
| Adhesive cable tie mounts (19×19 mm, pack of 100) | $4–$8 |
| Adhesive mounts (25×25 mm, pack of 100) | $6–$11 |
| Adhesive mounts (28×28 mm, pack of 100) | $8–$13 |
| Screw-mount tie bases (M3, pack of 100) | $4–$7 |
| Complete kit (100 adhesive mounts + 100 6″ ties) | $7–$12 |
| One-piece adhesive mounting ties (pack of 50–100) | $6–$15 |
| Push-in mounting ties (pack of 100) | $8–$18 |
| Rivet/saddle mount bases (pack of 100) | $6–$14 |
| Individual heavy-duty screw-mount tie (bulk pricing) | $0.10–$0.25 each |
Per-piece, mountable ties cost roughly 2–5× a standard tie — but they replace the separate mount, screw, and labor you’d otherwise need, so the total installed cost is usually lower. For a broader look at cable tie pricing by size and type, see our article on nylon plastic tie prices.
How to Choose the Right One
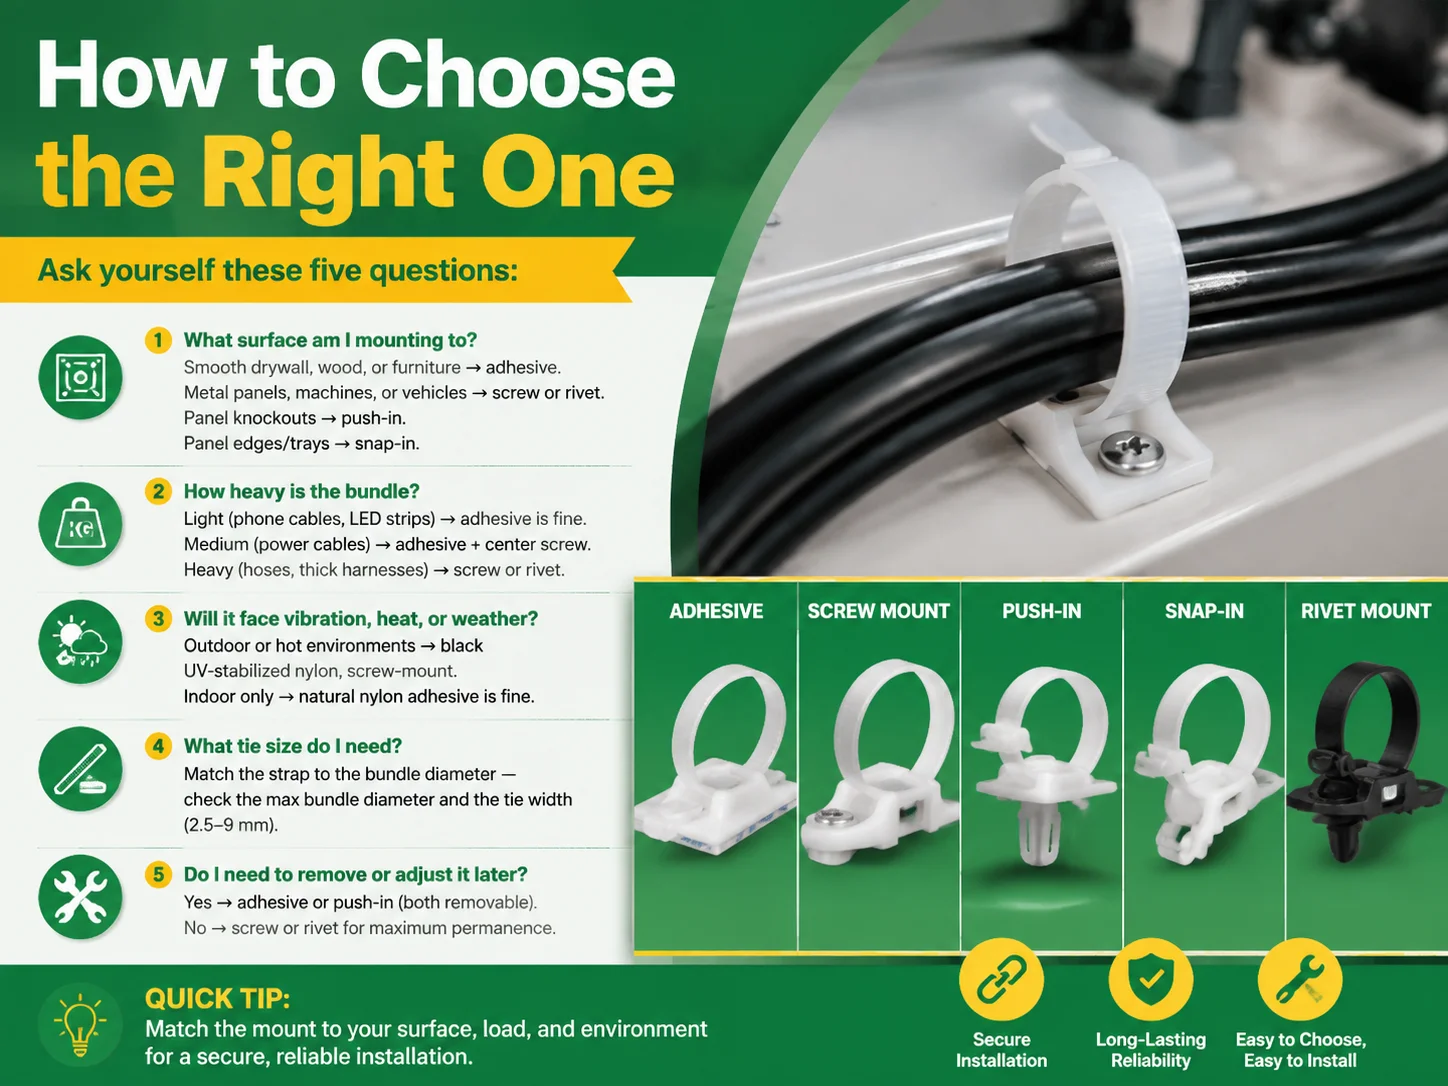
Consider five questions:
- What surface are you working with? If you are working with smooth surfaces like drywalls or wood, adhesive will work. If the surface is made of metal, you should be using screw or rivet. If it is made of panel knockouts, push-in mounting should do. If it is made of panel edges or tray, you should go with snap-in mounting.
- What is the weight of the bundle? If the bundle is light (like phone cables, LED strips) adhesive would work fine. If it is moderate (let’s say power cords), we can use adhesive along with center screw. If the weight is heavy (like hoses or thick harnesses), screw or rivet should be used.
- Will it be exposed to vibrations, temperature or weather conditions? If the cable is exposed to rain or is going to be used in high temperature, use black, UV resistant and mounted to metal cable. If it is only going to be inside, we can use just natural nylon adhesive.
- How to choose the width of the tie? The width of the tie should match up with the diameter of the bundle. The max diameter of the bundle should be verified against the width of the tie (2.5-9mm).
- Are we going to need to remove it or adjust it later? If it is to be removed, then adhesive or push-in should be used since both can be removed. If we do not need to remove it, only screw or rivet should be used.
For a systematic approach to choosing any cable tie, our how to choose the right cable ties guide walks through length, width, material, and strength selection step by step.
Frequently Asked Questions
Are mountable cable ties the same as regular zip ties?
A standard zip tie only serves the purpose of keeping wires together. On the other hand, a mountable cable tie has an additional ability of providing a fixing feature. It can comprise power adhesive, hole for a screw, arrow or snap clip for fixing the bundle to the surface of the wall, panel, or tool. Standard ties are usually less expensive than others, but they can’t hold the wires on their place.
Do adhesive cable tie mounts actually stick well?
Definitely — it does work provided that the surface is cleaned and prepared prior to applying it. The clean and dry surface is very important: it must be wiped with isopropyl alcohol and then allowed to dry completely. It is necessary to apply the pad once it’s completely dry and press it tightly for approximately 10 seconds. The period ranging from 15 to 30 minutes (ideally 24 hours) must be observed for bonding fully. The high-quality pad works because it has 3M adhesive foam on it which can hold several kilograms depending on the surface. In case you want to secure heavier loads or the surface is rough, use the center screw hole for fixing or opt for the screw-mount tie.
What size cable tie do I need for a mounting base?
Ensure that the tie width fits the base slot you are using. The small slot will allow for a tie which is as wide as 4.8 mm while the medium slot will function with ties measuring anything from 5.5 mm to as wide as 10.2 mm depending on specific types. Also, make sure to measure the diameter you plan to strap to determine the appropriate strap size since the length of the strap will depend on the width of the bundle.
Can mountable cable ties be reused?
The strap itself can be reused only once, except for those with a release tab. For some one-piece straps, you can press the release tab to slide it off the mount. Sticky pads are for one-time use only—when you take them off, they must be replaced or remounted with the center screw. Push-in or screw-mount designs can be reused fully (you must take them off and put them back in a different place). If you want fasteners that can be reused, you should think about hook-and-loop fasteners.
References
- Essentra Components — Mounting Cable Ties Catalog — Industry catalog showing the full range of mounting tie types (screw, push-in, snap-in, rivet, adhesive) with hole diameters, bundle capacities, and tensile strengths.
- UL Solutions — The safety certification body whose UL94 flammability ratings (V-2, V-0) and UL 62275 standard apply to cable ties and mounting accessories.
- Panduit — Major manufacturer of cable ties and mounting systems; their published guides cover adhesive performance, mounting methods, and material selection.
- HellermannTyton — Global manufacturer of cable management products; reference for mounting tie series, release-tab designs, and push-mount applications.
- ISO — Publishes ISO 62275 (cable ties for electrical installations), which specifies test methods and requirements for cable ties and mounting accessories.
- 3M — The adhesive technology supplier whose foam tapes are used on most quality adhesive cable tie mounts; their documentation explains bond strength, surface preparation, and cure times.
Conclusion
Mountable cable ties are tiny devices working behind the scenes to provide flawless commercial and residential wiring at its best. They gather together wires in neat and tidy manner making sure that the cables lay flat and organized — whether you keep them under the desk, inside an electric cabinet, or threading the frames of machines.
Key points you should know:
- Select the mount according to the surface: adhesive is your option for flat surfaces where you don’t want to drill any holes; screws and rivets work for machines and vehicles; push-in type of mounts is applicable for the equipment with panel knockouts, while trays requiring snap-in type of mounts.
- Proper surface preparation=successful adhesive: clean and dry the surface for 10 seconds and let it sit for 24 hours to make adhesive work properly.
- Price for 100-pack kit will come at $4–$15 making it affordable for anyone who wants to equip their cables with something reliable.
- Use black UV-stabilized nylon for working outdoor or in very hot places.
- Removal is a piece of cake: cut the strap off or use the release mechanism which will allow you to peel off adhesive base or unscrew the mount for good.
If you are trying to organize your cables but cannot find a trustworthy tie at the moment, use this guide to help you select the right device.