




How to Use a Zip Tie Gun for Professional Cable Installation
Using a zip tie gun not only speeds up pulling a zip tie but also helps to control both parameters that determine the quality of installation: the tension and the cut. Therefore, in order to learn how to use the zip tie gun properly, start from here. The rest of the article will focus on getting the right tension for the bundle being tied and providing a good cut that is not dangerous to touch later on.
Now it should be emphasized from the very beginning, as most of the guides confuse everything: a zip tie gun determines the quality of installation, but it is a zip tie that determines the quality of the result obtained. The strength, resistance to heat, ultraviolet radiation, and service life depend on the zip tie used. The best tool cannot make a zip tie that is usually used indoors work for five summers in a row.
Zip tie gun, also named as a cable tie gun or cable tie tension tool, is a hand-operated device which tightens the nylon cable tie to a pre-defined tension and subsequently cuts off its excess. The tension dial determines how tight the cable tie will hold the bundle together; the automatic yield of the device is that it eliminates the unwanted protruding tail of the cable tie which remained there due to the operation of side cutters. The device is responsible for the quality of installation, while the character of the cable tie’s material, its width and different additives define its strength characteristics, UV stability, temperature range and its level of flammability.

What a Zip Tie Gun Actually Does
The standard nylon cable tie stops working due to a small pawl in the head moving over the oblique teeth on the strap. You can learn about how one direction works from our description of how a self-locking cable tie works. If you pull it by hands, the tie turns out to be as tight as the effort you put into it, and the remaining part of the tie is cut off with the help of either cutting pliers or scissors.
The zip tie gun eliminates these manual processes and replaces them with a controlled work:
①.Tensioning. The gun captures the tail and pulls it through the head whenever the trigger is pressed or when the lever is turned.
②.Tension sensing. The spring device is used to restrain the process until the required tension is achieved. This spring mechanism is usually adjustable using a numbered dial or knob.
③.Cut-off. Once the required tension is reached, the blade is released and the tail is cut off straight at the head.
④.Snap-back. The tension within the bundle enables the cut part of the tail to retract back into the head.
This last step provides the explanation of the relationship between tension and cut. The patent literature on these tools indicates that if the tension is very low, the tie may not have enough spring force to pull back the cut part of the tail.
How to Use a Zip Tie Gun: Step by Step
The instructions that follow pertain to a basic trigger-style zip tie gun designed for nylon zip tie usage, though the same principles apply to flip lever style zip tie guns that are robust and involve more force.
1. Select the desired zip tie
Select the appropriate zip tie according to the work environment before utilizing the zip tie gun. The size, length, and type of the zip tie determine whether the tie suffices. Ensure the zip tie dimension matches the tool specifications. In general, most trigger mechanism tools are able to deal with zip ties with a maximum size of 4.8 mm spanning but wider zip ties that are more robust require lever type zip tie guns. Our tie wrap sizes guide helps match length to bundle diameter.
2. Adjust the tension dial
Start with the lowest force possible and work upward. The adjustment present on the tool should depend on the zip tie size used and the need for soft binding rather than on the digits mentioned on the packaging of the zip tie. The tension should be tested on the scraps of the zip tie used and according to the adjustment it can be altered later on in the process.
3. Wrap the zip tie and insert the tail into the tool
Bend the zip tie around the bundle, insert the end into the head so that the tooth faces the inner side and draw it tight with your hands. It’s important to place the head in the desired position, generally away from the hands and various moving mechanisms.
4. Insert the tail into the zip tie gun
Push the tail of the zip tie into the tool so that the end of the tool is well placed against the head of the zip tie. Do not twist the device or move it at an angle.
5. Click until the device severs the zip tie
Press the trigger in the steady way. With every click, the zip tie is being pulled through the head. When the necessary tension has been established, the blade will cut automatically. Be steady with the hands during the process.
6. Check the result
Move your glove covered fingers across the head and check the cut edges, ensure that they do not protrude from the head face and the zip tie holds the bundle tightly. Any discrepancies mean that you can correct the problem by altering the settings.

Tensile Strength Is Not a Tension Setting
This is probably the most misunderstood concept about how to install cable ties and it is where most cable tie installers make their mistake.
Take IGOTO’s High Strength cable tie as an example. It is 4.8 mm wide and made from PA66 nylon, rated to have a tensile strength of 22 kg (50 lb). This 22 kg refers to the maximum weight that the tie has the ability to hold until it breaks — it is the maximum load capacity, not the amount of tension that should be used.
Do not crank the tool up to maximum tension just because the tie has a big tensile rating. Tensile strength is the amount of load that the tie can hold. The tension setting on the tool is how much pressure is applied to the bundle. If you use a 50 lb tie at its limit right away, there won’t be any extra strength left to handle vibration, thermal expansion, or other additional loads that may occur.
In practice, the correct tension setting is the lowest amount of tension that does not allow the bundle to move and allows producing clean cuts. The higher tensile strength is only an additional safety factor, which can be helpful when machines work for years, when a cable run expands in summer heat, or when someone leans on a bundle during maintenance. For a deeper look at how ratings are measured, see how strong nylon cable ties really are.
A basic rule of thumb for different types of bundles:
- Data and fiber optic cables: minimum tension, because if too much tension is used, it can result in distortion of twisted pairs and signal loss.
Power cables and hoses: medium tension, since a good grip must be guaranteed without making cable jacket deform.
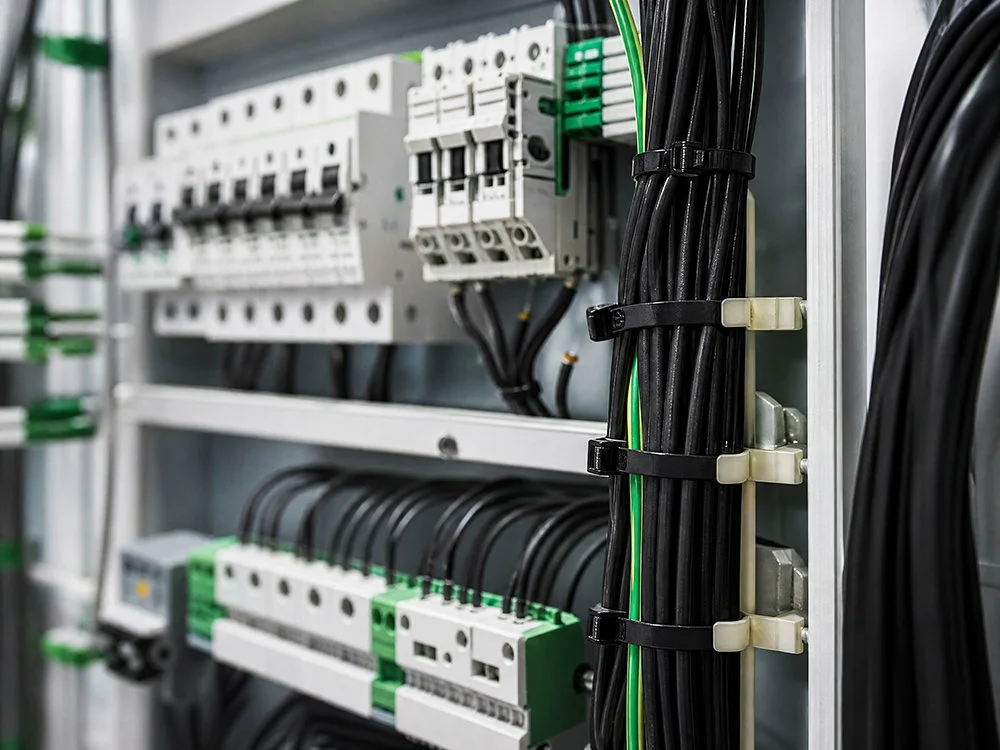
Control wiring in panels: low to medium tension, enough to hold the bundle on its path.
Why the Flush Cut Matters More Than Speed
When it comes to using a zip tie gun, its key feature is speed. But in reality, flush cut is much more important feature.
When tie is cut with any type of cutter, about 2-3 mm of tail hangs out of the head at an angle, creating a sharp end. Thus, when this method is applied repeatedly, many ties with sharp angles are left on the cable connection area which can easily injure the technician’s hands and interfere with gloves.
When a proper zip tie gun is used, the end is cut flush at the head of the tie. As a result, there are no sharp ends, without any risk of damage.
| Result | Side cutters or scissors | Zip tie gun |
|---|---|---|
| Tail length after cut | Typically 2 to 3 mm protruding | Flush with or just inside the head |
| Cut edge | Often angled and sharp | Square, recessed |
| Tension consistency | Depends on the installer’s grip | Repeatable, set by the dial |
| Risk to cable jackets | Over-tightening is common | Controlled when set correctly |
| Hand injury risk during maintenance | Higher | Lower |
The flush cut is vital in the worksites of professionals, such as electrical power distribution panels, motor vehicle wiring harnesses, machine control compartments, and all machinery that a technician frequently handles. If hand trimming is necessary, flush cut pliers must be used rather than regular diagonal cutters while the jaws remain flat onto the head.

Same Gun, Different Tie: Matching the Tie to the Job
Here is the core idea again: the gun controls installation, but the tie determines strength, temperature resistance, UV resistance and service life. The same nylon cable tie gun can install all of the following. What changes is the tie.
| Application | Main challenge | Tie to choose |
|---|---|---|
| Indoor electrical panels and distribution boards | Neat routing, clean finish | Standard nylon tie |
| Solar installations and rooftop arrays | Intense sunlight, high surface temperatures | UV-resistant black tie |
| Telecom cabinets and outdoor towers | UV exposure, heat inside enclosures | UV-resistant tie, low tension on data and fiber |
| HVAC units and ductwork | Heat, vibration, outdoor condensers | UV-resistant or heat-stabilized tie |
| Automotive wiring | Engine bay heat, vibration | Heat-stabilized tie |
| Industrial machinery | Heavy harnesses, constant vibration | High-strength tie |
| Oil and gas, infrastructure, industrial plants | Fire codes, harsh outdoor conditions | Flame-retardant or UV-resistant tie as specified |
Outdoor, solar and telecom work
Sunlight is the biggest adversary of nylon. Natural (white) ties weaken under ultraviolet radiation, while black ties containing carbon black do perform better. The situation is most critical in areas where the sun shines fiercely and where the temperatures are high, for example, in the Southwest of the USA or in the countries of the Middle East, where solar panels, electrical equipment and telecommunications systems stay exposed to the sunlight for a long time. For these jobs, pair your gun with UV-resistant cable ties, and read how long ties actually last in the field in our guide to how long zip ties last outside.
High-heat environments
The engine compartments, machinery and plant structures in hot environments can put regular nylon to the test. For example, IGOTO’s High Strength series, which is suitable for continuous use within the temperature range of –35°C to +85°C. For hotter environments, one can opt for a suitable type of ties, which has been discussed in a corresponding article on high temperature tie wraps.
Fire-rated installations
Certain projects, particularly involving infrastructure, public transportation, and factories, require each component of the cable path to have a rating for combustibility. Though they are called “zip tie guns”, their use has no significance in regard to the rating. Please consult our guide on flame-retardant cable ties for what the ratings mean.
Common Zip Tie Gun Problems and How to Fix Them
More often than not, zip tie gun troubles arise from improper tool usage instead of the tool itself being defective.
The tail sticks out. Usually either the tension is set too low or you’re holding the gun at an angle. Increase the tension by one notch, and keep the nose square with the head.
The cut is jagged or the tail is already crushed but not cut off. The blade is dull or the tie is wider than the tool can manage. Replace or sharpen the blade and ensure the tie’s width is within the tool’s specifications.
The tie breaks or the head pops while applying tension on it. The tension has been set too high for that tie width. Reduce it or switch to a thicker and stronger tie.
The tie slips or will not grab on the object. The tail was not inserted completely or the gripping jaws are worn or clogged with pieces of nylon. Clean the jaws and insert them completely.
Cable jackets are damaged. The amount of tension is too much for that bundle. Reduce it; this is especially important for data and fiber cables.
The cut end is being pulled through the jaws and disturbing the tie. Too much tension is applied to it. Reduce the tension.
Inconsistent results throughout the job. The dial has been turned by accident or ties from different batches are in use. Double-check the seating process from time to time and buy from one supplier.
Never cut the tensioned ties when your face or hand is on the same line with the head of the tool. If the tie is broken at that moment, the piece can fly off. Wear goggles all the time, especially when working high or using very powerful tools.
Nylon Tie Guns vs Metal Tie Guns
A nylon cable tie device is designed specifically for nylon cable ties. Stainless steel cable ties have a different closure mechanism, typically utilizing a ball-lock head. Stainless steel ties require much more force to use. It will also require the use of a device for stainless steel ties. Using steel ties with a nylon tie device could mean dulling or damaging the nylon tie device.
For most electrical, solar, telecom, and HVAC work, a decent quality nylon cable tie is more than sufficient. Stainless steel ties are generally used in extreme heat and corrosive environments or where regulations require the use of metal fasteners.
Maintenance Tips for Long Tool Life
- Regularly clean nylon shavings away from the nose and jaws of the tool.
Replace the blade when the cuts are no longer clean, as a dull blade will crush rather than cut.
According to the producer, store the tool with tension set to a low level so as to avoid fatigue of the spring.
Check the calibration of the tool with the test tie at the beginning of every work session.
Keep the tool dry and clean, especially when working outdoors or on construction sites.
How does a zip tie gun work?
A zip tie gun grips the tail of a nylon cable tie and pulls it through the head with each squeeze. A spring-loaded mechanism, set by a tension dial, holds back until the tie reaches the preset tension. At that point a blade fires and cuts the tail flush with the head, and the stored tension pulls the cut end slightly back into the head.
What are the common problems with zip tie guns?
The most common problems are tails left protruding after the cut, ties that slip or will not grip, ties breaking under too much tension, jagged cuts from a dull blade, and deformed cable jackets from over-tightening. Almost all of them are solved by adjusting the tension dial, holding the tool square to the tie head, cleaning the jaws, or replacing the blade.
Do you need a cable tie gun for metal zip ties?
Yes. Stainless steel zip ties need a dedicated stainless steel tie tool to tension them properly and cut them cleanly. A gun designed for nylon ties is not strong enough to cut steel and can be damaged by trying.
How do you properly use a zip tie?
Select a tie that matches the conditions and wrap it around the bundle with teeth pointing inward, insert the tail through the head, and pull tight until the bundle is firmly held without damaging the cables. Finally, cut the tail off level with the head ideally with a tensioning tool or flush-cut pliers leaving no sharp edges.
What tension setting should I use on a zip tie gun?
Adjust to a setting that is around the lowest setting that is able to keep the bundle steady and makes sure that the cut is clean and flush. Start at low settings, do a trial run on a disposable bundle, and gradually build up. Remember that the number on the knob does not correlate to how much tension should be applied to the tie but instead indicates its load capacity.
Can a zip tie gun be used on any cable tie?
Only ties in the correct width and of the correct material may be used. Most trigger action tools accommodate standard and medium nylon ties, typically up to 4.8mm in width. Larger heavy-duty ties require a lever-operated tool and metal ties require a special metal tie tool.
References
- US7422037B2: Low tension flush cut-off cable tie installation tool, Google Patents
- Cable tie, Wikipedia
- Maurus Logan and the invention of the cable tie, National Inventors Hall of Fame
- Carbon black, Wikipedia
Conclusion
Learning how to use a zip tie gun comes down to two controls: detemine the tension relative to the load but not according to the figures given on the package, and let the unit make the needed cut smoothly and flush. Do this with all ties in the panel, cabinet or harness, and all of them will be installed uniformly and work the same. One further thing to remember: the gun performs the job. Choose the tie according to the strength, resistance to heat, UV rays and longevity, and let the gun do its work, from installation to the very end.


